Cold Storage Tips for Garden Vegetables Keep Harvests Fresh Longer
A basket of carrots, beets, cabbage, and potatoes can feel like a small victory at the end of the growing season. Then comes the harder part: keeping that harvest crisp, firm, and useful long after the garden beds are empty.
Cold storage is one of the simplest ways to stretch homegrown food. It slows sprouting, wilting, mould, and flavour loss without needing complicated equipment. The trick is matching each vegetable to the right mix of temperature, humidity, airflow, darkness, and container.
A fridge, cold room, basement, garage, shed, or root cellar can all work, as long as the conditions stay steady. In Canada, that often means watching for freezing temperatures in garages and sheds, especially during deep winter. Most vegetables store best just above freezing, not frozen solid.
Start with clean, mature, undamaged vegetables
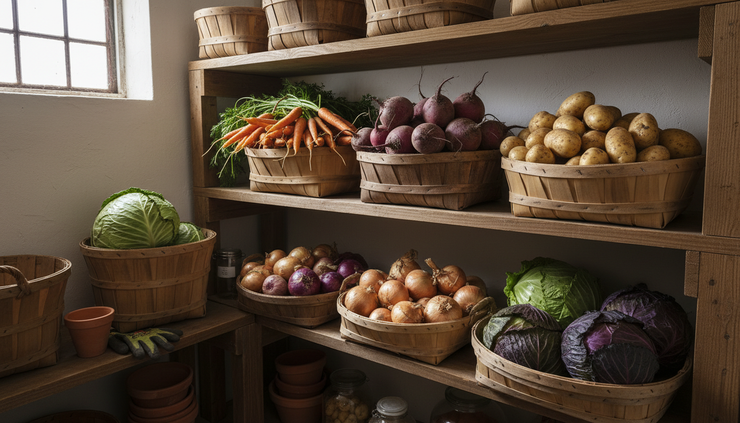
Good storage starts before anything reaches the cellar shelf. Cold storage can slow decay, but it cannot fix bruised, split, or diseased produce. A single rotting potato or soft beet can spoil the vegetables around it.
Harvest on a dry day when possible. Soil should brush off easily, and vegetables are less likely to carry excess moisture into storage. Wet crops invite mould, especially in closed bins or plastic bags.
Handle the harvest gently. Potatoes, winter squash, onions, and cabbage may look tough, but bruises often show up later as soft spots. Use shallow baskets or crates instead of deep buckets that crush the produce at the bottom.
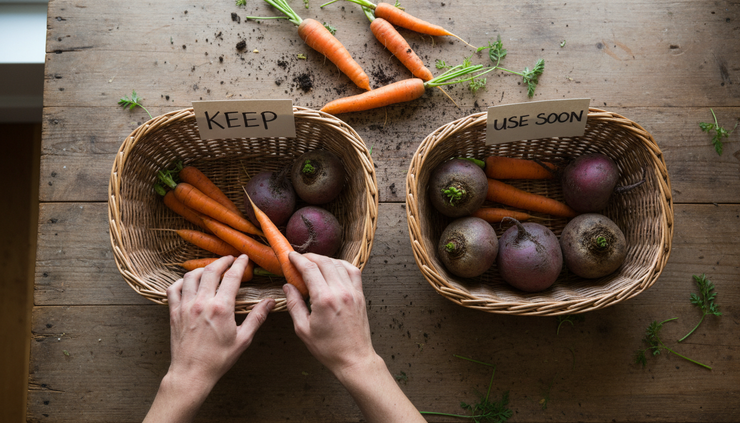
Before storing, sort vegetables into three groups:
Best keepers
Firm, mature, unblemished vegetables with no cuts, pest damage, or soft areas.
Use soon
Small, nicked, split, or thin-skinned produce that will not store as long.
Compost or discard
Anything mouldy, slimy, deeply bruised, or showing signs of rot.
Do not wash most storage vegetables before putting them away. Carrots, beets, potatoes, rutabagas, turnips, and parsnips usually store better with soil brushed off, not scrubbed clean. Washing adds moisture and can damage skins.
Leafy greens are different. They need to be rinsed, dried well, and cooled quickly, since they wilt fast and do not store like root crops.
The best cold storage tips for garden vegetables begin with one simple rule: store only healthy produce, and eat the imperfect pieces first.
Match temperature and humidity to the crop
Most garden vegetables fall into a few storage groups. Some like it cold and moist. Others need cool, dry air. A few prefer conditions warmer than a fridge.
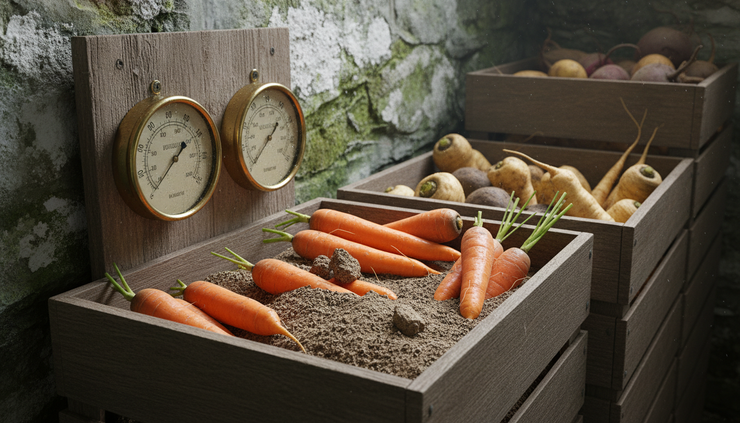
A small thermometer and humidity gauge are worth having. Place them where the vegetables sit, not near a heater, freezer, window, or exterior door. Check conditions during cold snaps and mild spells, since basements and garages can swing more than expected.
Vegetable group | Best temperature | Best humidity | Good storage spots |
Carrots, beets, parsnips, rutabagas, turnips | 0°C to 4°C | 90% to 95% | Root cellar, fridge, cold room |
Cabbage, Brussels sprouts, leeks | 0°C to 4°C | 90% to 95% | Root cellar, fridge, cold room |
Potatoes | 4°C to 7°C | 85% to 90% | Dark basement, cold room, insulated garage |
Onions, garlic, shallots | 0°C to 10°C | 60% to 70% | Dry basement, pantry, cool closet |
Winter squash and pumpkins | 10°C to 13°C | 50% to 70% | Cool pantry, dry basement |
Leafy greens | 0°C to 2°C | High humidity | Fridge crisper drawer |
Tomatoes at the mature-green stage | 12°C to 18°C | Moderate humidity | Cool room, pantry shelf |
Cold storage does not mean every crop goes in the coldest place available. Temperatures below 0°C can freeze cell walls, leaving vegetables limp or watery after thawing. Potatoes stored too cold will turn sweet and may brown too quickly when fried. Winter squash can suffer chilling injury in a fridge or icy garage.
Humidity matters just as much. Root crops lose water through their skins, so they need moist air to stay crisp. Onions and garlic need drier air, or they may sprout and mould. This is why mixing all vegetables in one big bin rarely works well.
If your storage area is too dry, use covered containers, damp sand, or perforated bags for crops that need moisture. If it is too damp, increase airflow, use slatted crates, and keep onions, garlic, and squash away from wet root crops.
Use the right containers for each vegetable
Containers should protect vegetables from drying out, bruising, freezing, and excess moisture. The best choice depends on the crop and the space.
Wooden crates, ventilated plastic bins, cardboard boxes, mesh bags, paper bags, clean pails, and fridge containers all have their place. The key is airflow for some crops and moisture retention for others.
For root crops, try these methods:
Damp sand or peat-free bedding
Layer carrots, beets, parsnips, turnips, or rutabagas in boxes with slightly damp sand, sawdust, shredded paper, or coir. The material should feel like a wrung-out sponge, not wet mud.
Perforated plastic bags
Store roots in bags with small holes to hold humidity while allowing gases and excess moisture to escape. This works well in a fridge or cold room.
Lidded bins with monitoring
Use bins only if you check them often. Open the lid now and then to release trapped moisture and remove any soft pieces.
For dry crops, choose breathable storage:
Mesh bags
Good for onions, garlic, and shallots after curing. Hang them where air can move.
Shallow crates
Best for potatoes and winter squash. One or two layers make inspection easier.
Paper bags or cardboard boxes
Useful for small onion or garlic harvests, as long as the room is dry.
Avoid sealing vegetables in airtight containers unless they are refrigerated short-term greens. Trapped moisture can quickly turn into condensation, which leads to mould.
Containers should also reduce light. Potatoes need darkness to prevent greening. Green potato skin can indicate solanine buildup, so cut away green parts generously or discard badly greened potatoes. A dark crate, cardboard box, burlap cover, or closed cupboard can help.
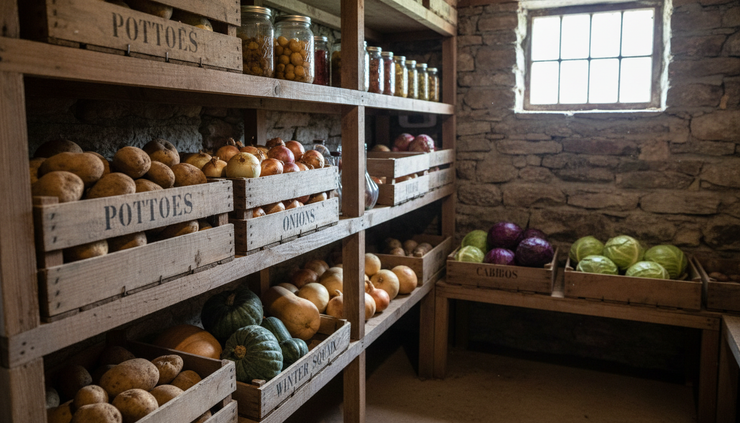
Label stored crops with the variety and harvest date. This simple habit helps you notice which varieties keep well in your conditions. Some carrot, cabbage, onion, and squash varieties are bred for storage, while others are best eaten fresh.
Give each vegetable the storage conditions it prefers
Different vegetables age in different ways. Some sprout, some shrivel, some sweeten, and some rot from the centre outward. A little crop-specific care can add weeks or months to the storage life of a harvest.
Carrots, beets, parsnips, turnips, and rutabagas
These are classic cold, moist storage crops. Remove leafy tops before storage, leaving about 1 cm to 2 cm of stem. The leaves keep pulling water from the root, so leaving them attached leads to limp vegetables.
Do not cut into the crown. Damaged crowns spoil faster.
Store roots in damp sand, coir, sawdust, or perforated bags at 0°C to 4°C with high humidity. Check every few weeks. If the bedding dries out, mist it lightly. If it smells sour or feels wet, open the container and improve airflow.
Parsnips can stay in the ground into cold weather if the soil is protected with mulch and the ground has not frozen solid. Their flavour often improves after frost. For storage indoors, treat them like carrots.
Potatoes
Potatoes need curing before long storage. After harvest, keep them in a dark, humid, well-ventilated space around 10°C to 15°C for about one to two weeks. This allows small cuts and scuffs to toughen up.
After curing, move potatoes to a darker, cooler place around 4°C to 7°C. Keep them away from onions and apples, which can encourage sprouting. Do not store them in the fridge for regular home use, since colder temperatures can affect texture and flavour.
Use crates, baskets, burlap sacks, or cardboard boxes. Keep light out, but do not block all airflow. Check for sprouting and softness through the winter. Remove sprouts before cooking, and use sprouting potatoes sooner.
Onions, garlic, and shallots
These crops need curing and dryness. After harvest, dry them in a warm, shaded, airy place until necks are tight and outer skins are papery. This can take a few weeks depending on weather.
Once cured, trim roots and tops, or braid tops if they are still flexible. Store onions, garlic, and shallots in mesh bags, baskets, or shallow trays. They prefer cool, dry air with good circulation.
Do not store them beside moist root crops. A damp cellar that keeps carrots crisp may cause onions to soften. Thick-necked onions and damaged bulbs do not store well, so use those first.
Cabbage, Brussels sprouts, and leeks
Cabbage stores well when heads are firm and mature. Leave a few wrapper leaves around each head to protect it. Store at 0°C to 4°C with high humidity. Place heads on shelves with space between them, or wrap loosely in perforated plastic.
Strong-smelling cabbage can affect nearby fruit and vegetables, so give it space if possible.
Brussels sprouts keep best on the stalk in cold, moist storage. Wrap the stalk loosely or stand it in a container if it fits. Leeks can be stored upright in damp sand or soil in a cold room, much like they grew in the garden.
Winter squash and pumpkins
Winter squash and pumpkins do not want root cellar cold. They store best after curing in a warm, dry spot. Cure squash at roughly 24°C to 29°C for about a week or two if possible, then store around 10°C to 13°C.
Keep them dry and well spaced. Do not pile them. Check the blossom end and stem area often, since rot often starts there.
Handle squash by the body, not the stem. A broken stem creates an entry point for decay. Acorn squash often has a shorter storage life than butternut, hubbard, or some kabocha types, so eat acorn squash earlier.
Leafy greens, broccoli, and herbs
Tender crops do not last for months in cold storage, but good handling still helps. Cool them quickly after harvest. Wash off soil, spin or pat dry, then store in breathable bags or containers lined with a towel.
Greens need high humidity but not wet leaves. Excess water causes slime. Keep them in the fridge crisper near 0°C to 2°C and use them within days to a couple of weeks, depending on the crop.
Broccoli, cauliflower, cilantro, parsley, spinach, lettuce, and kale all benefit from fast cooling. Kale and hardy greens tolerate cold better than lettuce, but they still need moisture control.
Tomatoes and peppers
Tomatoes do not belong in cold root storage unless the goal is short-term slowing. Mature-green tomatoes can ripen indoors at cool room temperature. Spread them in a single layer and check often.
Keep tomatoes around 12°C to 18°C if you want slow ripening. Warmer rooms ripen them faster. Remove any fruit that softens or leaks.
Peppers are short-term keepers. Store firm peppers in the fridge in a ventilated bag. For longer keeping, freezing, drying, or pickling works better than cold storage.
Set up a reliable cold storage routine
A good storage space does not need to be fancy. It needs to be steady, clean, dark, and easy to check.
For many homes, the best spot is a basement corner, unheated cold room, spare fridge, insulated garage cabinet, or enclosed porch that stays above freezing. The right choice depends on your winter temperatures and your home.
In colder parts of Canada, garages and sheds can freeze hard. Use a thermometer that records highs and lows if you are testing a new storage area. During cold snaps, move bins away from exterior walls and concrete floors. A thick piece of wood or foam under crates can reduce freezing risk.
For root crops that need moisture, place bins low, where air is cooler. For squash and onions, choose a drier shelf with more airflow. Never place vegetables against furnace rooms, hot water tanks, sunny windows, or heat vents.
Build these habits into the season:
Check stored vegetables every one to two weeks.
Remove anything soft, mouldy, sprouting heavily, or leaking.
Keep containers clean and dry on the outside.
Maintain darkness for potatoes.
Open damp bins briefly if condensation forms.
Eat shorter-keeping crops first.
Save your best storage varieties for later winter use.
One useful method is to create an “eat first” basket. Fill it with small onions, nicked carrots, thin-skinned squash, cracked cabbage heads, and potatoes with minor damage. Keep the best specimens in long-term storage and cook from the eat-first basket during the first few weeks after harvest.
If rodents are a concern, use secure bins, metal shelving, and tight-fitting doors. Avoid leaving spilled produce, loose seeds, or open compost near the storage area.
Also keep ethylene in mind. Apples, pears, and ripening tomatoes release ethylene gas, which can speed sprouting or aging in some vegetables. If you store fruit in the same room, place it away from potatoes, carrots, cabbage, and greens. Good airflow helps, but distance is better.
Make the harvest last with small adjustments
Cold storage works best when it becomes part of the harvest routine, not an afterthought at the end of a long gardening day. Cure the crops that need curing. Trim tops from roots. Keep moist crops moist and dry crops dry. Use containers that protect produce without trapping the wrong kind of moisture.
The biggest gains often come from simple changes: a thermometer in the cold room, perforated bags in the fridge, damp sand for carrots, better airflow around onions, and regular checks through winter.
Start with one or two storage crops you grow well, then refine the setup each season. A few notes on temperature, containers, and which varieties lasted longest will teach you more than guesswork. With the right conditions, more of the garden can make it to the table crisp, firm, and full of flavour long after harvest day.


Comments